
How to Set Up the Flutter Environment!! (Windows Edition)
Today, we will walk through setting up the Flutter environment on Windows!
Table of Contents
- Downloading the Flutter SDK
- Setting the PATH
- Setting Up Android Studio
- Configuring Android Licenses
- Running
flutter doctor - Summary
Downloading the Flutter SDK
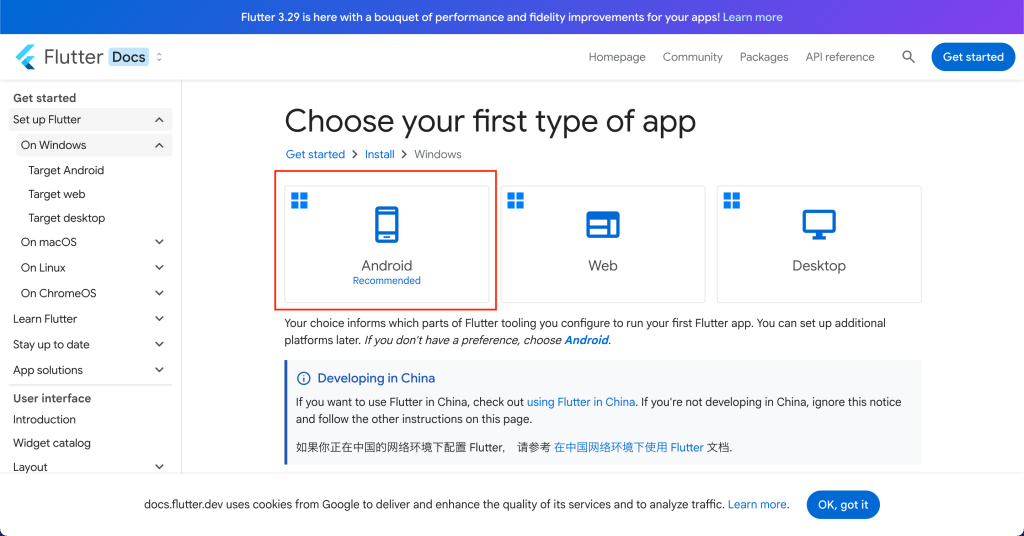
Visit the official Flutter website.
Select Android as your platform.
Download the Flutter SDK (ZIP file).
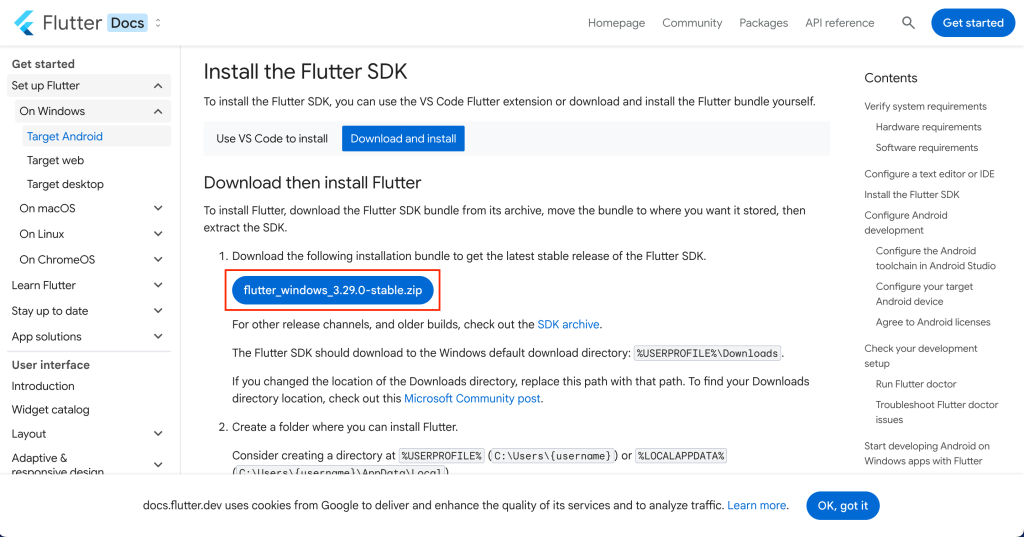
Extract the downloaded ZIP file.
Create a folder named dev in Local Disk (C:).
Move the extracted flutter SDK into the dev folder.
Setting the PATH
To access the flutter command from anywhere, add it to the system PATH.
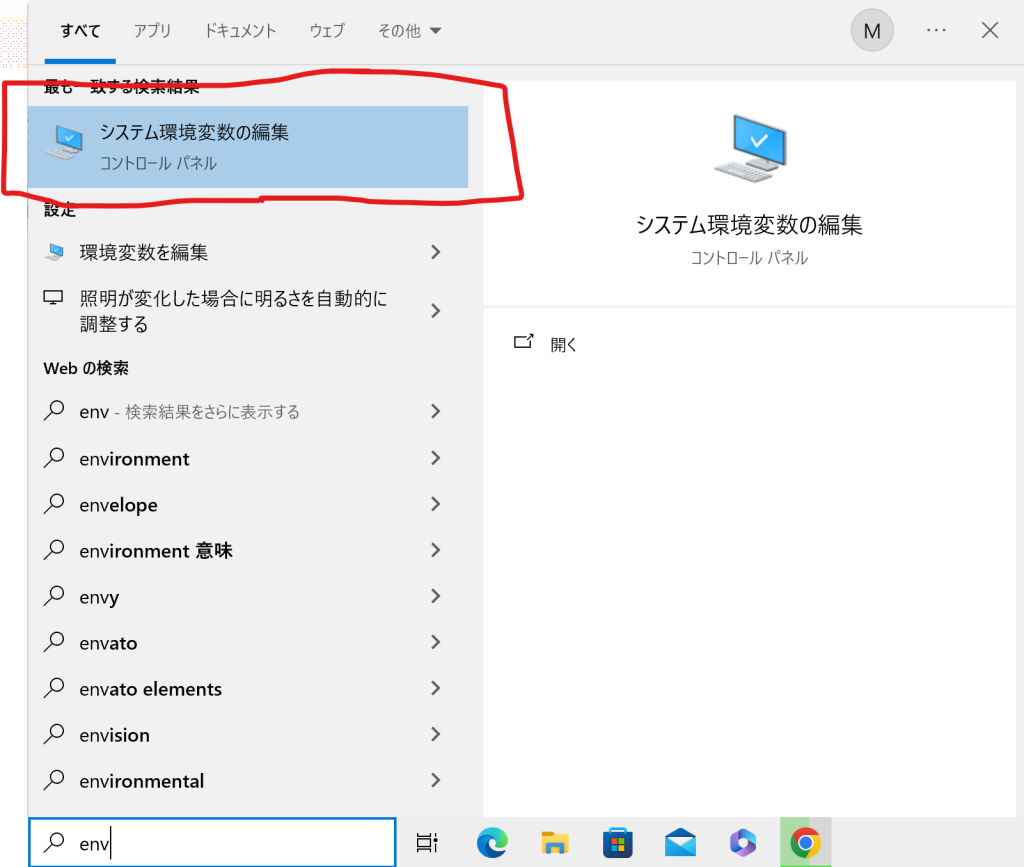
In Windows Search, type env and open Edit the system environment variables.
Click the Advanced tab and select Environment Variables.

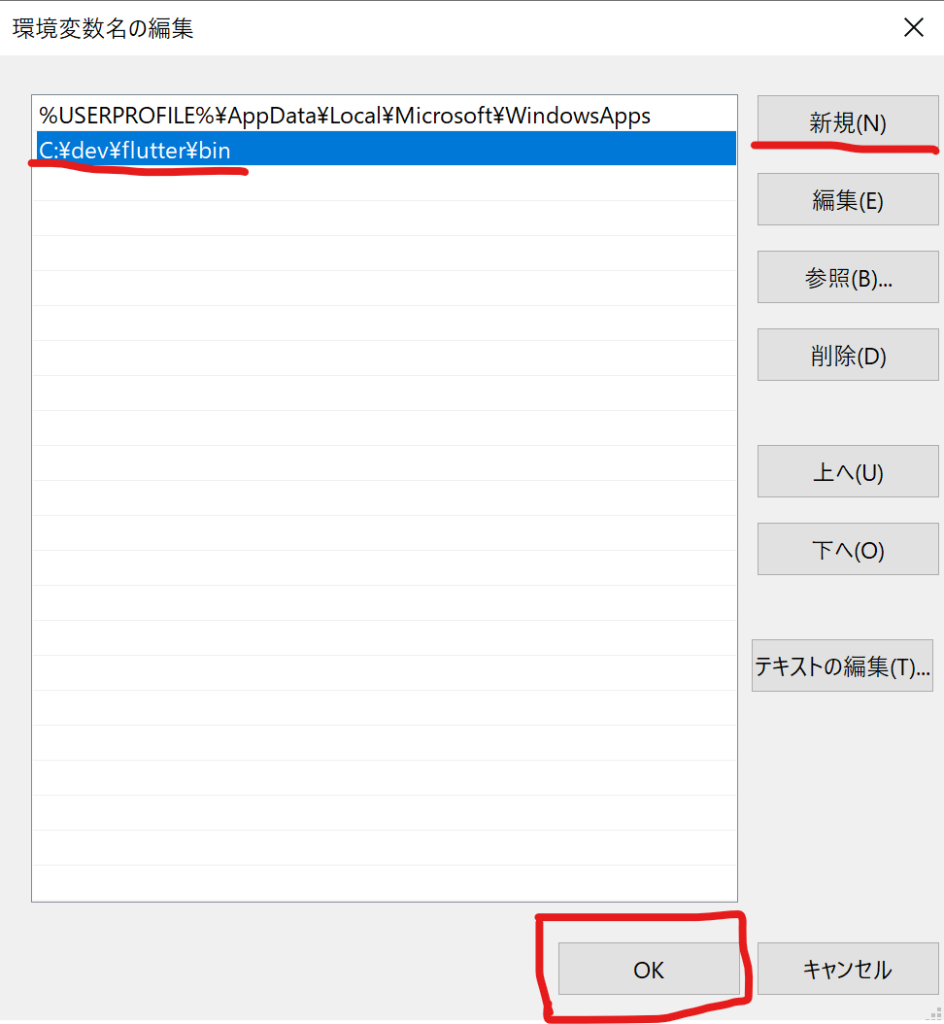
Under System Variables, find Path, select it, and click Edit.

Click New and enter the path to the bin folder inside the Flutter directory.
Example: C:\dev\flutter\bin
Click OK to save.
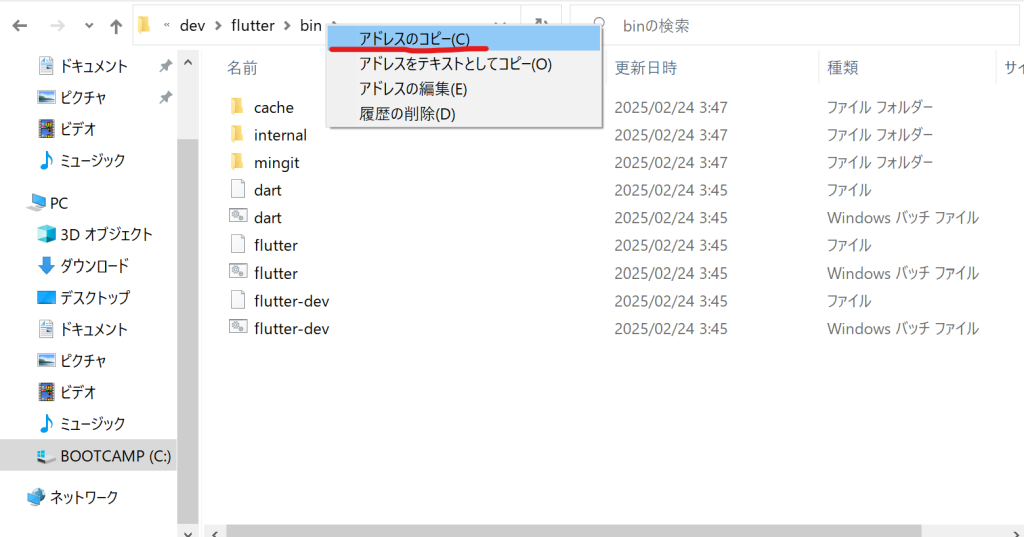
💡 How to copy the correct path?
Open the bin folder inside the Flutter directory.
Right-click the address bar at the top and select Copy address as text.
Paste it when adding the new PATH entry.
Setting Up Android Studio
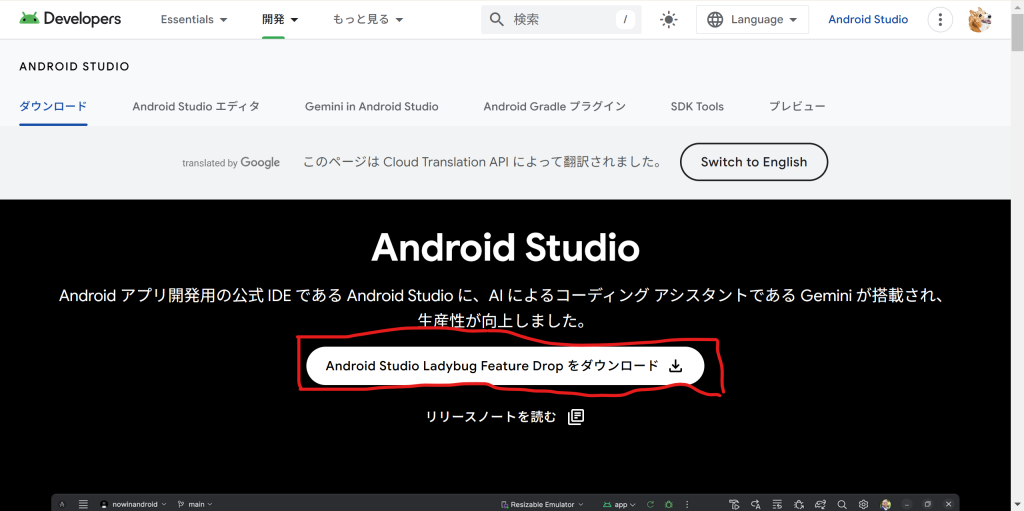
Download Android Studio from the official website.
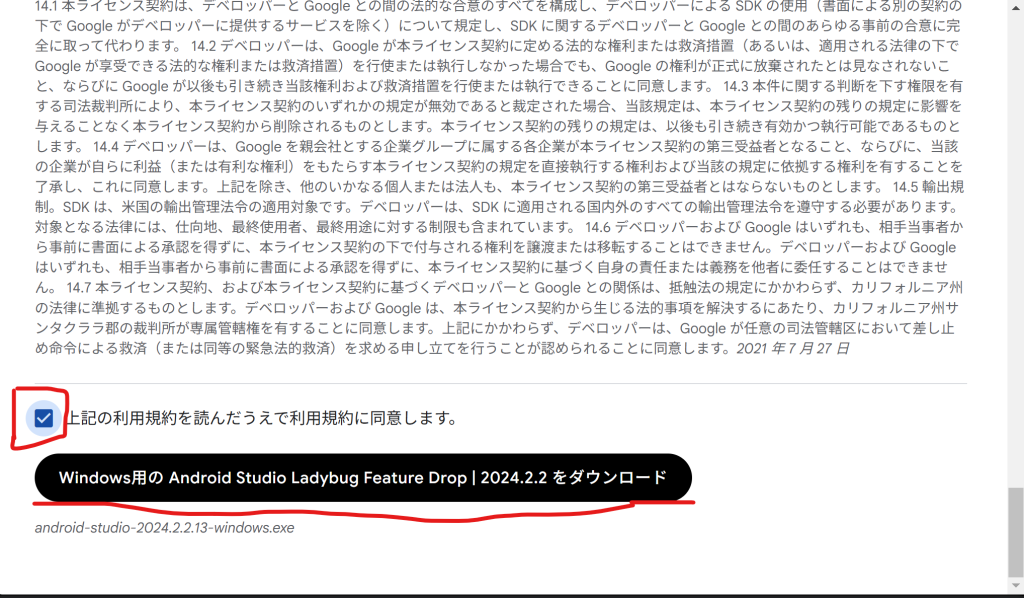
Agree to the Terms and Conditions and click Download.
Run the downloaded file and follow the installation steps.
If unsure, click Yes or Next to proceed with default settings.
Once installed, open Android Studio.
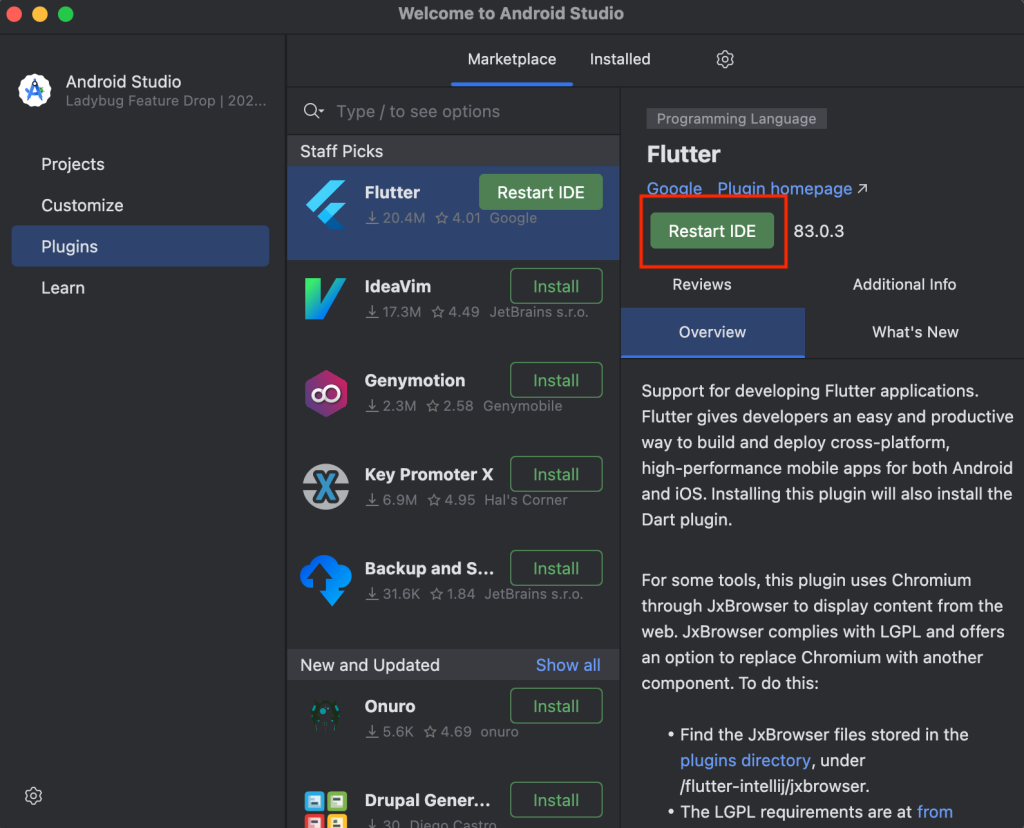
Install the Flutter plugin:
Go to Preferences → Plugins.
Search for Flutter and click Install.

Click Restart IDE after installation.
Install Android SDK Command-line Tools:
Open Android Studio → SDK Manager.
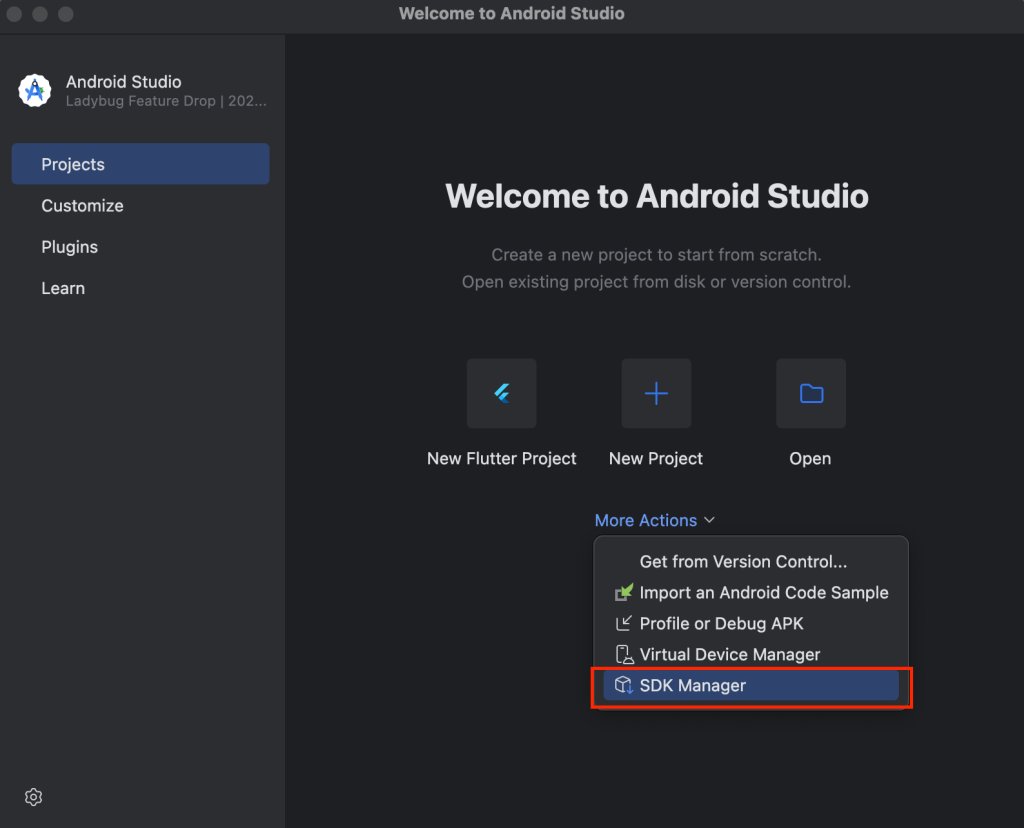
Go to Android SDK → SDK Tools tab.
Check Android SDK Command-line Tools (latest) → Click Apply.

Click OK to install.
Configuring Android Licenses
To accept Android SDK licenses:
Open Command Prompt (cmd).
Run the following command:
flutter doctor --android-licenses
When prompted, type y and press Enter to accept the licenses.
Review licenses that have not been accepted (y/N)? y
You may need to do this 5 times to accept all agreements.
Once you return to the normal terminal, the setup is complete. ✅
Running flutter doctor
After setting up Android Studio, run:
flutter doctor
This command checks your Flutter environment and lists any missing dependencies.
💡 For detailed error messages, use:
flutter doctor -v
If all items show green checkmarks (✔), you’re good to go! 🎉
Summary
Today, we covered how to set up Flutter on Windows!
If you encounter any errors, take a deep breath and search for solutions using the error message.
🚀 Happy Flutter Development! 🚀
2025-03-08
0件のコメント
コメントはまだありません。最初の一人になりましょう!